
In short, what you'll discover in this article: a clear and simple guide to setting up Android eSIM on your smartphone. You'll learn how to activate and configure the eSIM card, manage multiple lines, transfer or delete a profile, and troubleshoot common issues.
1. Introduction: What is an eSIM and Why Use It on Android
An eSIM is a virtual SIM card embedded directly into your Android smartphone. Unlike a physical SIM card, it allows you to activate a mobile plan without inserting a card. This simplifies switching carriers, managing multiple lines, and using your phone while traveling. To understand the benefits and how this technology works, check out our dedicated article on what an eSIM is.
2. Before You Start: Requirements and Compatibility
2.1 Compatible Android Models and Required Versions
Not all Android smartphones support eSIM. Recent models like the Samsung Galaxy (S20 and newer), Google Pixel (3 and later), and some Motorola or Huawei devices are compatible. Make sure your device runs a recent Android version, usually Android 10 or higher, to benefit from native eSIM support.
2.2 Check Carrier Support
Before activating your eSIM, verify that your carrier offers this service. Most major French and international carriers now provide eSIM plans. You can consult the list of supported carriers directly on their website or through specialized guides like gosimless.
3. Getting Your eSIM from the Carrier
3.1 QR Code vs Activation Code vs Provisioning via App
To activate your eSIM, your carrier will usually provide a QR code to scan. Sometimes, an SM-DP+ activation code is given for manual entry, or a dedicated app allows automatic provisioning. These methods link your phone to the eSIM profile securely.
3.2 Costs and Types of Plans (Prepaid, Subscription, Roaming)
eSIM plans can be prepaid, regular subscriptions, or roaming-specific for travelers. Prices vary depending on the carrier and the chosen plan type. Be sure to compare offers to optimize your mobile budget.
4. Installing and Setting Up an eSIM on Android (Step-by-Step)
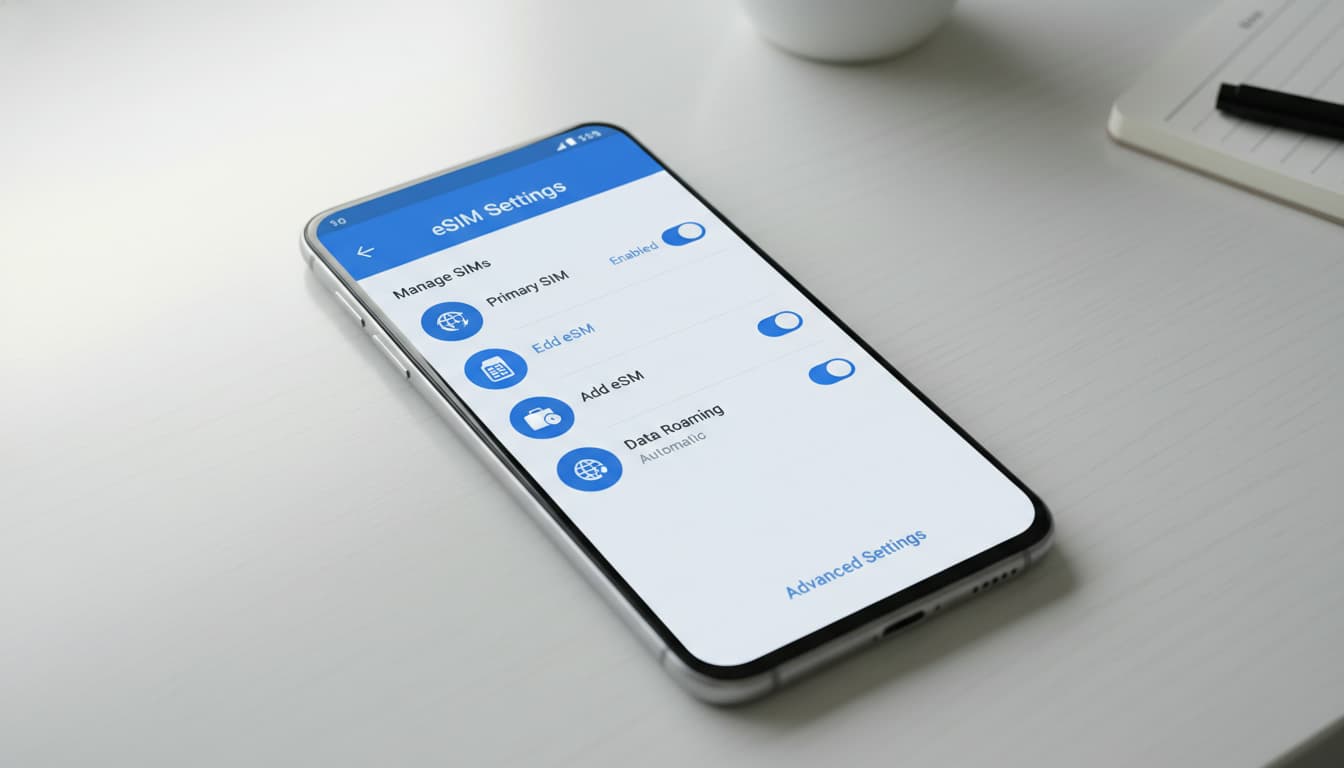
4.1 Access Settings > Network & Internet > SIM cards
To start setting up your Android eSIM, open Settings, then go to Network & Internet, and finally SIM cards or SIM card manager depending on your device.
4.2 Scan the QR Code / Manually Enter the SM-DP+ Code
Tap on Add mobile plan or Add eSIM, then scan the QR code provided by your carrier. If you don’t have a QR code, select the option to manually enter the SM-DP+ code. Wait a few moments for activation.
4.3 Activate the Line and Check the Connection (APN Test)
Once the eSIM profile is installed, activate the line in settings. Verify your internet connection by browsing or calling. If needed, set up the APNs (Access Point Names) to ensure proper mobile data management.
5. Managing Multiple Lines and Settings (Dual SIM)
5.1 Set the Primary Line for Data, Calls, SMS
With eSIM, you can use a dual SIM smartphone: one physical SIM and one eSIM. In the settings, choose your primary line for mobile data, calls, and SMS. This allows easy management of personal and work plans.
5.2 Switch Between Lines and Adjust Data Settings Abroad
When traveling, you can switch between your lines to optimize costs. Enable or disable the secondary line’s connection as needed and adjust roaming settings to avoid excessive fees.
6. Transferring or Deleting an eSIM
6.1 eSIM Transfer Between Devices (Process and Limits)
Transferring an eSIM profile from one smartphone to another isn’t always automatic. Some carriers offer tools to facilitate this; otherwise, you often need to request a new QR code. Note that transfer management also depends on device compatibility.
6.2 Safely Delete an eSIM Profile
To delete an eSIM, go to SIM card settings, select the profile to delete, and confirm the removal. This frees the line and ensures your profile isn’t active on an unused device.
7. Troubleshooting: Common Errors and Solutions
7.1 QR Code Not Recognized / Activation Failure
If the QR code isn’t recognized, check the image quality and your internet connection. Try restarting your phone or entering the SM-DP+ code manually. If issues persist, contact your carrier.
7.2 Data Problems: APN and Network Restart
Connection problems may be caused by incorrect APN settings. Verify these in your eSIM profile and restart the mobile network. Sometimes, a full network settings reset is necessary.
7.3 Contacting the Carrier: Information to Provide
For effective support, prepare your phone number, smartphone model, Android version, and any error messages. This info helps speed up problem resolution.
8. FAQ and Best Practices (Security, Backup, Travel)
To secure your eSIM, avoid sharing your QR code and back up your profiles via options your carrier provides. When traveling, prefer local eSIM plans to reduce costs. Also, consider using a VPN to protect your mobile data, especially on public networks.
9. Additional Resources
9.1 Links to Carrier Pages and Support Tools
Visit your carrier’s official sites for eSIM activation guides and support tools. They often offer FAQ sections and dedicated apps to manage your profile easily.
9.2 Tutorials for Specific Models (Internal Links) and Printable Checklist
For deeper insight, check out our eSIM installation guide and our article on how dual SIM works. These resources complement this tutorial with model-specific tips.
Steps to Set Up Android eSIM:
- Check your smartphone and carrier compatibility.
- Get your QR code or activation code from the carrier.
- Open Settings > Network & Internet > SIM cards.
- Select “Add eSIM” and scan the QR code.
- Activate the line and configure APNs if needed.
- Test your internet connection and calls.
Practical Tips for Successful Activation:
- Ensure a stable WiFi connection during activation.
- Update your Android system before starting.
- Keep your QR code accessible and secure.
- If issues arise, restart your phone before contacting support.
For a complete detailed guide, check out the Android eSIM tutorial by gosimless, which provides precise instructions and screenshots for various models.
10. Conclusion
Setting up an eSIM on Android is now easy thanks to clear steps and tools provided by carriers. By following this guide, you can activate and manage your eSIM effortlessly, enjoy dual SIM functionality, and stay connected everywhere. To learn more, explore our other articles on advanced eSIM management and mobile security.
For more tips and tutorials on eSIM technology, keep reading on Skyda.co.